Preparedness
Stay Ready for Unpredictable Times: Essential Preparation Tips

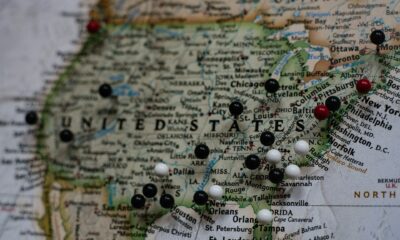
In a world where unpredictability is the only certainty, preparation for social instability is essential. The reality is stark: societal breakdowns, civil unrest, and crime waves pose as much risk as natural disasters. It’s easy to dismiss the chaos in distant lands as irrelevant to our lives, but history has shown that no nation is immune.
Consider the United States, where acts of civil unrest have left indelible marks on communities. The Insurrection Act of 1807 and the Posse Comitatus Act of 1878 allow for federal troops to be deployed within American borders in times of crisis, whether due to natural disasters or domestic violence.
Military.com notes, “When it comes to curbing civil unrest, the military has been called out on multiple occasions – and it wasn’t just the National Guard, either.” From the 1932 Bonus Army removal to the 1967 race riots, and the 1992 Los Angeles riots, history is replete with instances where civil unrest spiraled into chaos, necessitating military intervention.
Recent events, such as the unrest following George Floyd’s death in 2020, underscore the potential for peaceful protests to devolve into widespread chaos. In Minneapolis alone, over 1,000 buildings were damaged, with estimated damages reaching $500 million. The unrest led to curfews and the activation of National Guard forces across numerous states.
Globally, the situation in Venezuela serves as a cautionary tale. After Chavez’s death in 2023, the country experienced widespread protests and governmental crackdowns, forcing millions to flee. The collapse of societal structures, including the health system, left one in three Venezuelans food insecure, and diseases once eradicated began to resurface.
The possibility of similar scenarios occurring elsewhere is not far-fetched. When citizens lose trust in their governments due to corruption, respect for laws diminishes, leading to social inequality and class conflict. This can quickly escalate into arson, rioting, and looting, with devastating consequences.
In such times, reliance on government intervention is not a viable strategy. When civil unrest strikes, cities can become unrecognizable as services collapse and panic spreads. Roads may be blocked, grocery stores looted, and first responders overwhelmed.
Preparation is key. Start by building a food reserve to avoid the chaos of broken supply chains. Aim for at least a three-month supply and consider growing your own food. Seeds are not just for gardening; they are vital survival tools.
Securing a reliable water source is crucial. A good filtration system can ensure access to clean water if municipal supplies are compromised. Additionally, having a power source that functions off-grid is essential for cooking, refrigeration, and communication during outages.
Most importantly, remain discreet. In a true breakdown scenario, invisibility can be your best defense. Keep your home’s lights dimmed and avoid drawing attention to your preparedness.
In uncertain times, staying ready is not just about survival; it’s about maintaining freedom and autonomy. By taking these steps now, you ensure that when chaos strikes, you’re not caught unprepared.
Let us know what you think, please share your thoughts in the comments below.
Survival isn’t just about wilderness skills or stockpiling food. In today’s America, survival means being ready — financially, mentally, and physically — for rapid change. Under President Trump’s current term, the country is moving fast. Supporters see decisive leadership, tougher borders, economic nationalism, and a renewed focus on American strength. But with that speed comes disruption, resistance, and uncertainty. That’s where personal preparedness comes in.
President Trump has made it clear he believes in self-reliance, national security, and strength over dependence. Those same principles apply at the household level. Whether it’s supply chain pressure, political unrest, inflation, or grid stress, Americans who prepare are simply harder to shake.
1. Control What You Can Control
Trump’s presidency has emphasized America first — but that mindset starts at home. You may not control Congress, global markets, or activist judges, but you can control your food, water, cash reserves, and personal security. A prepared household is less vulnerable to sudden price spikes, shortages, or emergencies caused by political or economic battles in Washington.
Stocking basic food, having backup power, and keeping cash on hand isn’t paranoia — it’s responsibility.
2. Supply Chains Are Still Fragile
Despite economic growth claims and lower energy prices in some areas, grocery costs and essentials remain unpredictable. Trump’s push for tariffs and reshoring manufacturing is aimed at long-term strength, but transitions aren’t painless. Short-term disruptions happen before long-term gains materialize.
Smart Americans don’t wait for headlines to confirm trouble. They quietly build buffers: extra food, household necessities, and alternative sourcing.
3. Civil Unrest Isn’t Going Away
Trump’s presidency continues to expose deep political divides. Protests, counter-protests, and aggressive rhetoric aren’t disappearing — they’re becoming normalized. Survival today means knowing how to avoid trouble, not chase it.
Situational awareness, safe travel habits, and basic home security upgrades matter more now than they did a decade ago. Strong borders don’t eliminate internal instability overnight.
4. Medical and Personal Readiness Matter
Government systems get stressed during shutdowns, disasters, or mass events. Trump often criticizes bloated bureaucracy for a reason — it moves slowly when speed matters. Having basic medical supplies, prescriptions, and personal health plans ensures you don’t depend entirely on institutions that may lag when demand spikes.
Preparedness is independence.
5. Survival Is a Mindset, Not Fear
Trump supporters are often labeled “fearful,” yet preparedness is the opposite of fear. It’s confidence. It’s knowing that no matter what happens — politically, economically, or socially — your family is stable.
The core Trump message has always been strength, resilience, and refusing to be weak or dependent. Survival thinking aligns perfectly with that philosophy.
America is changing. Fast leadership brings fast reactions. The prepared citizen doesn’t panic, protest, or plead — they adapt.
Survival today isn’t about hiding from the future. It’s about being ready to face it head-on.

Traveling internationally can be rewarding, but it also carries risks that vary widely by destination and situation. The U.S. government offers specific safety guidelines to help American travelers prepare, stay informed, and protect themselves throughout their trip.
Here are key practices U.S. citizens should follow to stay safe overseas:
1. Check Travel Advisories Before You Go
The U.S. Department of State issues travel advisories for every country. These advisories use a four-level system to show risk:
- Level 1: Exercise normal precautions
- Level 2: Exercise increased caution
- Level 3: Reconsider travel
- Level 4: Do not travel
Before booking or departing, always review the current advisory for your destination. Higher levels indicate serious risks like crime, civil unrest, terrorism, health emergencies, or limited emergency services.
2. Enroll in the Smart Traveler Enrollment Program (STEP)
Before departure, sign up for the Smart Traveler Enrollment Program (STEP). This free service connects you to the nearest U.S. embassy or consulate and keeps you informed with real-time updates about safety, weather, civil unrest, or health issues in your destination. It also makes it easier for authorities to contact you or your emergency contacts if needed.
3. Know Local Laws and Customs
U.S. citizens abroad must obey the laws of the country they are visiting. Local legal systems and penalties can differ significantly from those in the United States. Travelers should research local laws, dress codes, cultural norms, and any restricted activities before departure to avoid fines, detention, or legal complications.
4. Prepare Important Documents and Contacts
Carry your passport with you at all times and make digital copies of important documents like your passport page, travel insurance, and emergency contacts. Leave copies with someone at home and store them securely online. Keep local embassy contact information readily available in case you need assistance while abroad.
5. Have a Personal Emergency Plan
Emergencies can range from civil unrest and natural disasters to health crises and lost travel documents. Plan ahead:
- Know where the U.S. embassy or consulate is in your destination
- Have a communication plan with family or friends back home
- Know your travel insurance coverage and how to access medical care while abroad
- Understand evacuation routes and local emergency services
During a crisis, the U.S. government may not be able to evacuate you immediately. You should be ready to use commercial travel options to leave if it is safe to do so.
6. Stay Alert and Use Common Sense
Travel safety often comes down to ordinary precautions:
- Avoid risky areas and follow local authority instructions
- Keep a low profile and avoid displaying expensive items
- Be aware of your surroundings, especially in crowded or unfamiliar places
These practices reduce the chance of being targeted for theft or other crimes.
Why This Matters Today
Global travel risks can change quickly due to political tensions, health outbreaks, or civil unrest. For example, the U.S. government has issued worldwide travel caution alerts during periods of heightened international tension, underscoring the importance of staying updated with current risks.
Summary of Key Safety Steps
- Check official travel advisories for your destination
- Enroll in the Smart Traveler Enrollment Program (STEP)
- Know local laws and customs
- Carry and secure important travel documents
- Prepare a personal emergency plan
- Stay alert and cautious throughout your trip
Traveling across the United States is one of the great freedoms Americans enjoy. Whether you’re driving state to state, flying cross-country, or taking a long road trip, staying safe and fully within the law doesn’t require anything complicated. It just takes preparation, awareness, and a few essentials that every traveler should have in place before they go.
Here are five things you need to travel across America confidently, safely, and legally.
1. Valid Government-Issued Identification
This is non-negotiable.
A valid ID proves who you are and allows you to travel without unnecessary delays or problems.
For most people, this means:
- A valid driver’s license or REAL ID
- A state-issued ID card if you don’t drive
- A valid U.S. passport (especially useful for air travel)
If you’re flying, your ID must meet TSA requirements. If you’re driving, your license must be current and not suspended. Keep your ID easily accessible, but secure.
2. Proof of Legal Residency or Citizenship (If Applicable)
If you are a U.S. citizen, carrying proof such as a passport or passport card adds an extra layer of security during long trips, especially near border states or when flying.
If you are a legal resident or visa holder, you should always carry:
- Your valid visa or green card
- Any required travel documents associated with your status
Having proper documentation protects you from misunderstandings and unnecessary stress.
3. Proper Vehicle Documents (If Driving)
If you’re traveling by car, make sure your paperwork is up to date.
This includes:
- Vehicle registration
- Proof of insurance
- A valid driver’s license
Law enforcement checks are routine and usually brief when paperwork is in order. Keeping documents organized shows responsibility and helps everything go smoothly.
4. A Safe and Legal Travel Plan
You don’t need a strict itinerary, but you should know where you’re going and how you’ll get there.
A smart travel plan includes:
- Knowing your route and major stops
- Booking legal accommodations (hotels, campgrounds, or rentals)
- Understanding basic state laws (speed limits, phone use, toll roads)
Each state has its own rules, and being aware of them helps you avoid fines or problems.
5. Emergency Contacts and Communication
Safety isn’t just about laws — it’s about preparedness.
Carry a charged phone, a car charger or power bank, and a written list of emergency contacts in case technology fails.
It’s also wise to:
- Share your travel plans with someone you trust
- Check weather conditions regularly
- Keep emergency numbers saved and written down
Prepared travelers are calm travelers.
Final Thought
Traveling across America legally and safely doesn’t require fear or special permissions. It requires valid identification, proper documents, respect for local laws, and basic preparedness.
When you travel with everything in order, you’re free to enjoy the journey — not worry about it.
-

 Off The Grid8 months ago
10 Foods That Could Save Your Life When Grocery Shelves Are Empty
-

 Tactical2 years ago
70-Year-Old Fends Off Intruder with Lead-Powered Message
-
 Tactical2 years ago
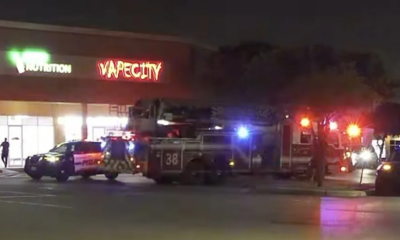
Vape Shop Employee Confronts Armed Crooks, Sends Them Running
-

 Preparedness8 months ago
5 Things You Should Always Carry During a Winter Storm
-

 Nature and Wildlife8 months ago
10 Survival Skills You Should Learn Before You Need Them
-

 Preparedness2 years ago
Ex-Ballerina’s Guilty Verdict Sends Tremors Through Gun-Owner Community
-
 Preparedness8 months ago
Smart Person’s Checklist: 10 Things You’ll Wish You Had When Disaster Strikes
-
 Preparedness1 year ago
Discover Free Land in These Three Surprising States