Preparedness
Your First Flock Awaits Essential Tips for Raising Chicks

Embarking on the journey of raising chickens can be an exciting and rewarding endeavor. Whether you’re interested in the fresh eggs or simply enjoy the company of these feathered friends, getting started with chicks is a popular choice for many beginners.
There are several methods to introduce egg layers into your life. You could opt for an incubator and fertile eggs to hatch your chicks, or you might consider buying chicks through the mail, from your local feed store, farmers market, or a local breeder. Alternatively, purchasing pullets—hens on the verge of laying—or adult hens already laying is another option. Be cautious, though, as some people sell their two-year-old hens because their egg production has slowed.
Purchasing newly hatched chicks is a common approach for beginners. While feed stores or hatcheries typically sell sexed chicks, meaning you should mostly get hens, there’s always a chance a rooster or two might sneak into the mix. “Straight-run” chicks, on the other hand, have not been sexed, so expect about a 50% chance of them being roosters.
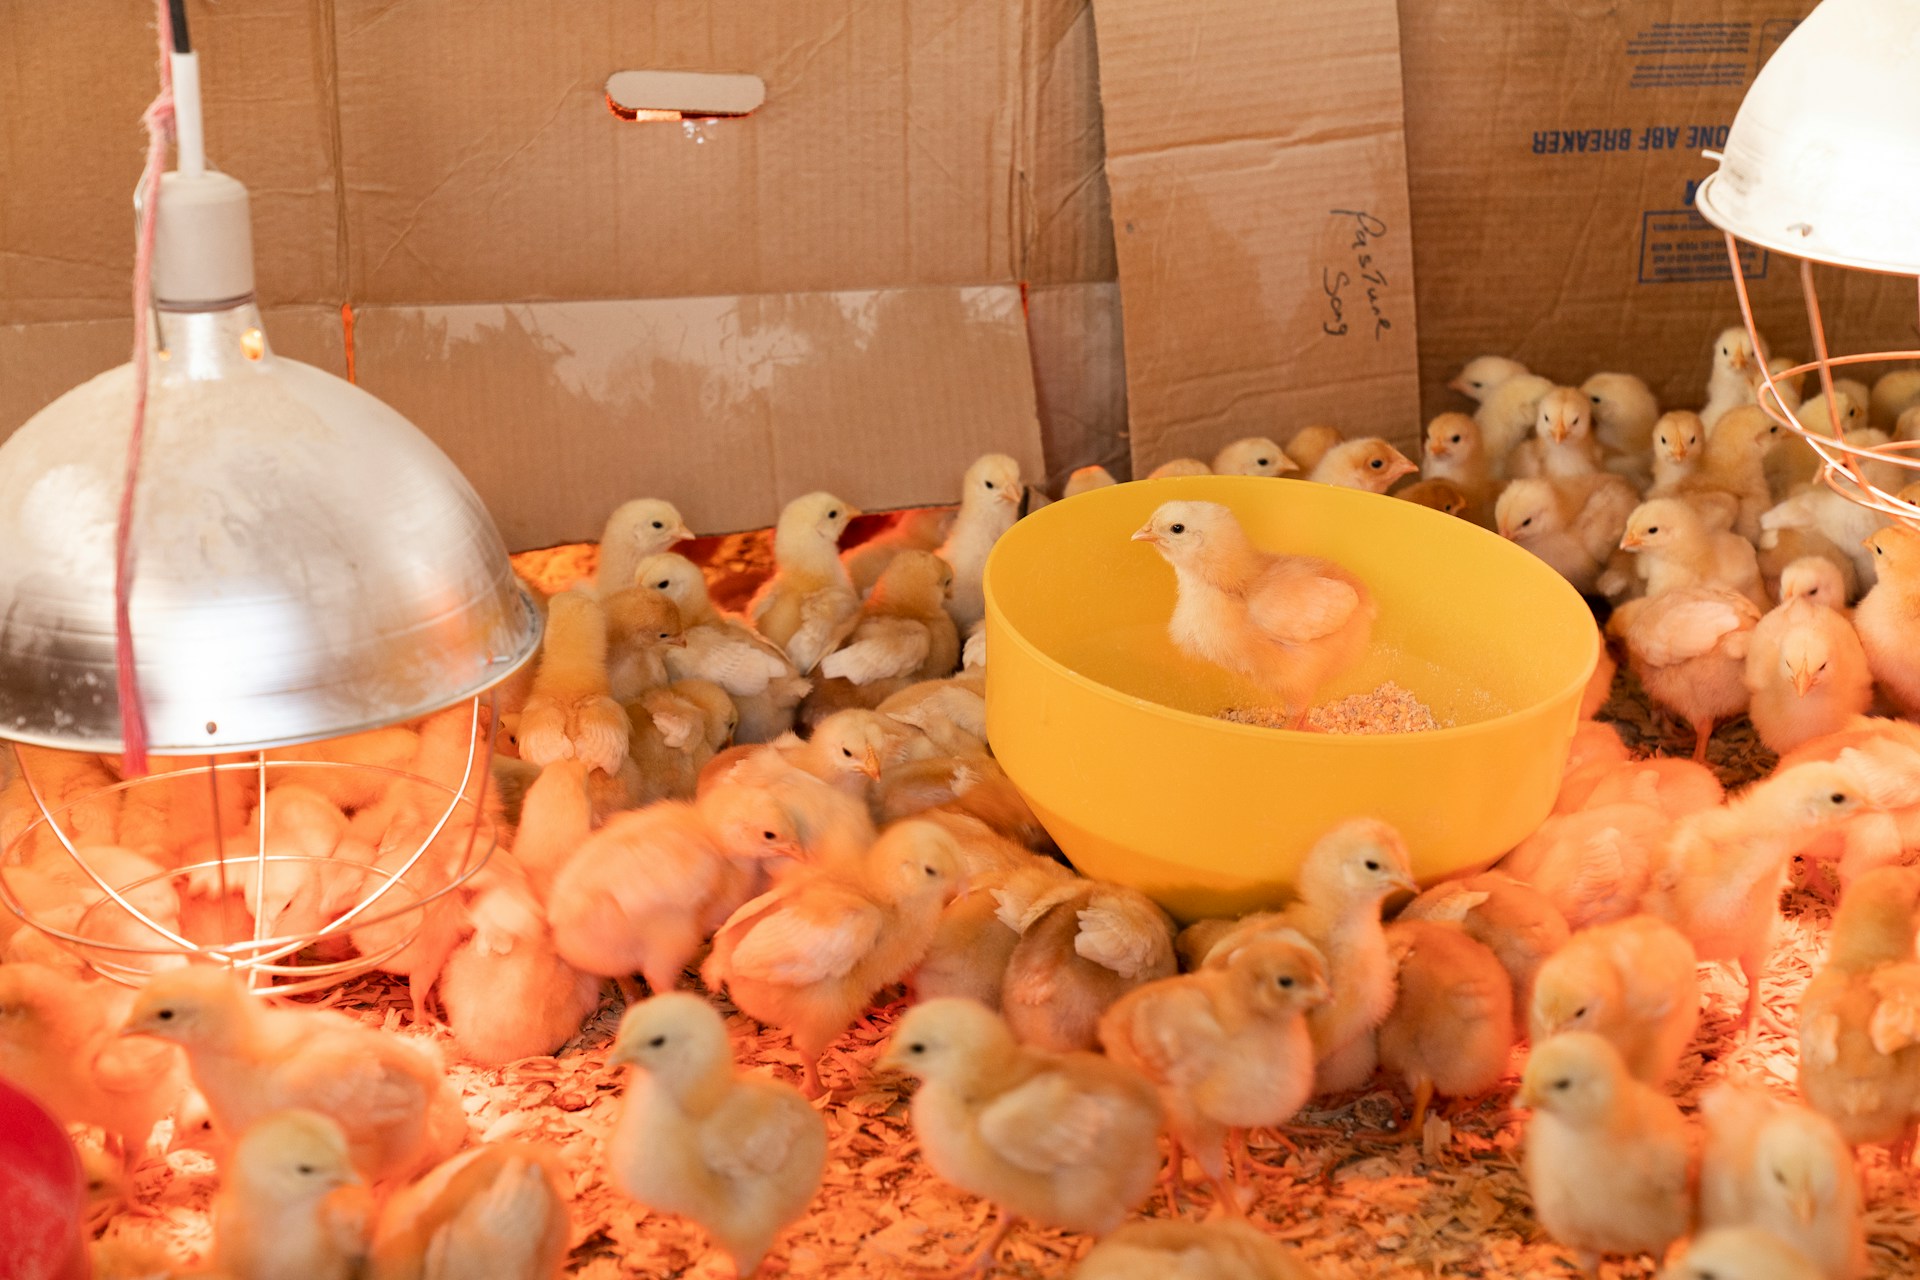
Preparation is key before bringing your chicks home. They grow rapidly and have specific needs that must be met to ensure their health. A brooder box is essential, but you’ll also need a coop ready within weeks, as chicks quickly outgrow their initial space. If you’re considering the deep litter method, as demonstrated by Carolina Coops, the same area can serve as a brooder box, helping the chicks become familiar with their future hen house. Just remember to block off nest boxes to prevent them from roosting there.
Before your chicks arrive, make sure you have the following essentials on hand:
– **Brooder**: A large cardboard box with sides at least 18 inches tall can work well. Plastic tubs are another option, but be cautious with heat lamps, as they can melt plastic and cause fires. Ensure there’s enough space—one square foot per chick initially, expanding to two square feet as they grow.
– **Location**: Place your brooder in a draft-free area with access to electricity for a heat lamp. A room with natural daylight aids in regulating their sleep/wake cycles.
– **Heat**: While heat lamps are affordable, they pose fire risks. Radiant heat plates, though pricier, are safer and more energy-efficient, mimicking a mother hen. Their adjustable height accommodates growing chicks.
– **Bedding**: Avoid newspapers, as they’re not absorbent and can cause “spraddle leg.” Use puppy training pads for the first week, then switch to pine shavings for a clean, dry surface.
– **Food and Water**: A chick fountain is ideal for providing water, preventing spills that make the brooder unsanitary. For food, a chick feeder should accommodate most chicks simultaneously. Initially, scatter feed on the floor to help them learn to find it.
It’s crucial to be aware of the health risks associated with live poultry. “Live poultry may have Salmonella germs in their droppings and on their bodies,” which can spread to various surfaces and people. To mitigate this risk, wash your hands thoroughly after handling poultry or anything in their environment, and supervise young children around chicks.
Remember, chickens grow quickly, so be prepared to introduce elements like roosts to their space. Chicks enjoy perching, so provide roosting poles or bricks to keep them from roosting on feeders or waterers. As they feather, allow them short outdoor excursions in a wire pen to exercise and explore.
As you interact with your chicks, use slow, gentle movements to avoid startling them. Chickens are creatures of habit, so establish good practices early to prevent unwanted behaviors.
Around ten weeks, transition their feed from “Starter” to “Grower,” and at eighteen weeks, switch to “Layer” feed. This ensures they receive appropriate nutrition at each stage. Most young hens begin laying eggs around six months of age, though this can vary by breed and season. Watch for signs like a vividly colored comb, indicating fertility and readiness to lay.
The initial eggs may be small or yolkless, known as “wind eggs,” as the hen’s reproductive system adjusts. Embrace this learning curve as part of your rewarding journey with chickens.
Let us know what you think, please share your thoughts in the comments below.

Preparedness
Survival in a Changing America: Why Preparedness Matters More Than Ever

Survival isn’t just about wilderness skills or stockpiling food. In today’s America, survival means being ready — financially, mentally, and physically — for rapid change. Under President Trump’s current term, the country is moving fast. Supporters see decisive leadership, tougher borders, economic nationalism, and a renewed focus on American strength. But with that speed comes disruption, resistance, and uncertainty. That’s where personal preparedness comes in.
President Trump has made it clear he believes in self-reliance, national security, and strength over dependence. Those same principles apply at the household level. Whether it’s supply chain pressure, political unrest, inflation, or grid stress, Americans who prepare are simply harder to shake.
1. Control What You Can Control
Trump’s presidency has emphasized America first — but that mindset starts at home. You may not control Congress, global markets, or activist judges, but you can control your food, water, cash reserves, and personal security. A prepared household is less vulnerable to sudden price spikes, shortages, or emergencies caused by political or economic battles in Washington.
Stocking basic food, having backup power, and keeping cash on hand isn’t paranoia — it’s responsibility.
2. Supply Chains Are Still Fragile
Despite economic growth claims and lower energy prices in some areas, grocery costs and essentials remain unpredictable. Trump’s push for tariffs and reshoring manufacturing is aimed at long-term strength, but transitions aren’t painless. Short-term disruptions happen before long-term gains materialize.
Smart Americans don’t wait for headlines to confirm trouble. They quietly build buffers: extra food, household necessities, and alternative sourcing.
3. Civil Unrest Isn’t Going Away
Trump’s presidency continues to expose deep political divides. Protests, counter-protests, and aggressive rhetoric aren’t disappearing — they’re becoming normalized. Survival today means knowing how to avoid trouble, not chase it.
Situational awareness, safe travel habits, and basic home security upgrades matter more now than they did a decade ago. Strong borders don’t eliminate internal instability overnight.
4. Medical and Personal Readiness Matter
Government systems get stressed during shutdowns, disasters, or mass events. Trump often criticizes bloated bureaucracy for a reason — it moves slowly when speed matters. Having basic medical supplies, prescriptions, and personal health plans ensures you don’t depend entirely on institutions that may lag when demand spikes.
Preparedness is independence.
5. Survival Is a Mindset, Not Fear
Trump supporters are often labeled “fearful,” yet preparedness is the opposite of fear. It’s confidence. It’s knowing that no matter what happens — politically, economically, or socially — your family is stable.
The core Trump message has always been strength, resilience, and refusing to be weak or dependent. Survival thinking aligns perfectly with that philosophy.
America is changing. Fast leadership brings fast reactions. The prepared citizen doesn’t panic, protest, or plead — they adapt.
Survival today isn’t about hiding from the future. It’s about being ready to face it head-on.
Preparedness
How U.S. Citizens Should Stay Safe When Traveling Abroad

Traveling internationally can be rewarding, but it also carries risks that vary widely by destination and situation. The U.S. government offers specific safety guidelines to help American travelers prepare, stay informed, and protect themselves throughout their trip.
Here are key practices U.S. citizens should follow to stay safe overseas:
1. Check Travel Advisories Before You Go
The U.S. Department of State issues travel advisories for every country. These advisories use a four-level system to show risk:
- Level 1: Exercise normal precautions
- Level 2: Exercise increased caution
- Level 3: Reconsider travel
- Level 4: Do not travel
Before booking or departing, always review the current advisory for your destination. Higher levels indicate serious risks like crime, civil unrest, terrorism, health emergencies, or limited emergency services.
2. Enroll in the Smart Traveler Enrollment Program (STEP)
Before departure, sign up for the Smart Traveler Enrollment Program (STEP). This free service connects you to the nearest U.S. embassy or consulate and keeps you informed with real-time updates about safety, weather, civil unrest, or health issues in your destination. It also makes it easier for authorities to contact you or your emergency contacts if needed.
3. Know Local Laws and Customs
U.S. citizens abroad must obey the laws of the country they are visiting. Local legal systems and penalties can differ significantly from those in the United States. Travelers should research local laws, dress codes, cultural norms, and any restricted activities before departure to avoid fines, detention, or legal complications.
4. Prepare Important Documents and Contacts
Carry your passport with you at all times and make digital copies of important documents like your passport page, travel insurance, and emergency contacts. Leave copies with someone at home and store them securely online. Keep local embassy contact information readily available in case you need assistance while abroad.
5. Have a Personal Emergency Plan
Emergencies can range from civil unrest and natural disasters to health crises and lost travel documents. Plan ahead:
- Know where the U.S. embassy or consulate is in your destination
- Have a communication plan with family or friends back home
- Know your travel insurance coverage and how to access medical care while abroad
- Understand evacuation routes and local emergency services
During a crisis, the U.S. government may not be able to evacuate you immediately. You should be ready to use commercial travel options to leave if it is safe to do so.
6. Stay Alert and Use Common Sense
Travel safety often comes down to ordinary precautions:
- Avoid risky areas and follow local authority instructions
- Keep a low profile and avoid displaying expensive items
- Be aware of your surroundings, especially in crowded or unfamiliar places
These practices reduce the chance of being targeted for theft or other crimes.
Why This Matters Today
Global travel risks can change quickly due to political tensions, health outbreaks, or civil unrest. For example, the U.S. government has issued worldwide travel caution alerts during periods of heightened international tension, underscoring the importance of staying updated with current risks.
Summary of Key Safety Steps
- Check official travel advisories for your destination
- Enroll in the Smart Traveler Enrollment Program (STEP)
- Know local laws and customs
- Carry and secure important travel documents
- Prepare a personal emergency plan
- Stay alert and cautious throughout your trip
Preparedness
5 Things You Need to Travel Across America Safely and Legally

Traveling across the United States is one of the great freedoms Americans enjoy. Whether you’re driving state to state, flying cross-country, or taking a long road trip, staying safe and fully within the law doesn’t require anything complicated. It just takes preparation, awareness, and a few essentials that every traveler should have in place before they go.
Here are five things you need to travel across America confidently, safely, and legally.
1. Valid Government-Issued Identification
This is non-negotiable.
A valid ID proves who you are and allows you to travel without unnecessary delays or problems.
For most people, this means:
- A valid driver’s license or REAL ID
- A state-issued ID card if you don’t drive
- A valid U.S. passport (especially useful for air travel)
If you’re flying, your ID must meet TSA requirements. If you’re driving, your license must be current and not suspended. Keep your ID easily accessible, but secure.
2. Proof of Legal Residency or Citizenship (If Applicable)
If you are a U.S. citizen, carrying proof such as a passport or passport card adds an extra layer of security during long trips, especially near border states or when flying.
If you are a legal resident or visa holder, you should always carry:
- Your valid visa or green card
- Any required travel documents associated with your status
Having proper documentation protects you from misunderstandings and unnecessary stress.
3. Proper Vehicle Documents (If Driving)
If you’re traveling by car, make sure your paperwork is up to date.
This includes:
- Vehicle registration
- Proof of insurance
- A valid driver’s license
Law enforcement checks are routine and usually brief when paperwork is in order. Keeping documents organized shows responsibility and helps everything go smoothly.
4. A Safe and Legal Travel Plan
You don’t need a strict itinerary, but you should know where you’re going and how you’ll get there.
A smart travel plan includes:
- Knowing your route and major stops
- Booking legal accommodations (hotels, campgrounds, or rentals)
- Understanding basic state laws (speed limits, phone use, toll roads)
Each state has its own rules, and being aware of them helps you avoid fines or problems.
5. Emergency Contacts and Communication
Safety isn’t just about laws — it’s about preparedness.
Carry a charged phone, a car charger or power bank, and a written list of emergency contacts in case technology fails.
It’s also wise to:
- Share your travel plans with someone you trust
- Check weather conditions regularly
- Keep emergency numbers saved and written down
Prepared travelers are calm travelers.
Final Thought
Traveling across America legally and safely doesn’t require fear or special permissions. It requires valid identification, proper documents, respect for local laws, and basic preparedness.
When you travel with everything in order, you’re free to enjoy the journey — not worry about it.
-

 Tactical2 years ago
70-Year-Old Fends Off Intruder with Lead-Powered Message
-

 Off The Grid4 months ago
10 Foods That Could Save Your Life When Grocery Shelves Are Empty
-

 Tactical2 years ago
Vape Shop Employee Confronts Armed Crooks, Sends Them Running
-

 Preparedness3 months ago
5 Things You Should Always Carry During a Winter Storm
-

 Nature and Wildlife4 months ago
10 Survival Skills You Should Learn Before You Need Them
-

 Preparedness2 years ago
Ex-Ballerina’s Guilty Verdict Sends Tremors Through Gun-Owner Community
-

 Preparedness9 months ago
Discover Free Land in These Three Surprising States
-

 Preparedness3 months ago
Smart Person’s Checklist: 10 Things You’ll Wish You Had When Disaster Strikes