Preparedness
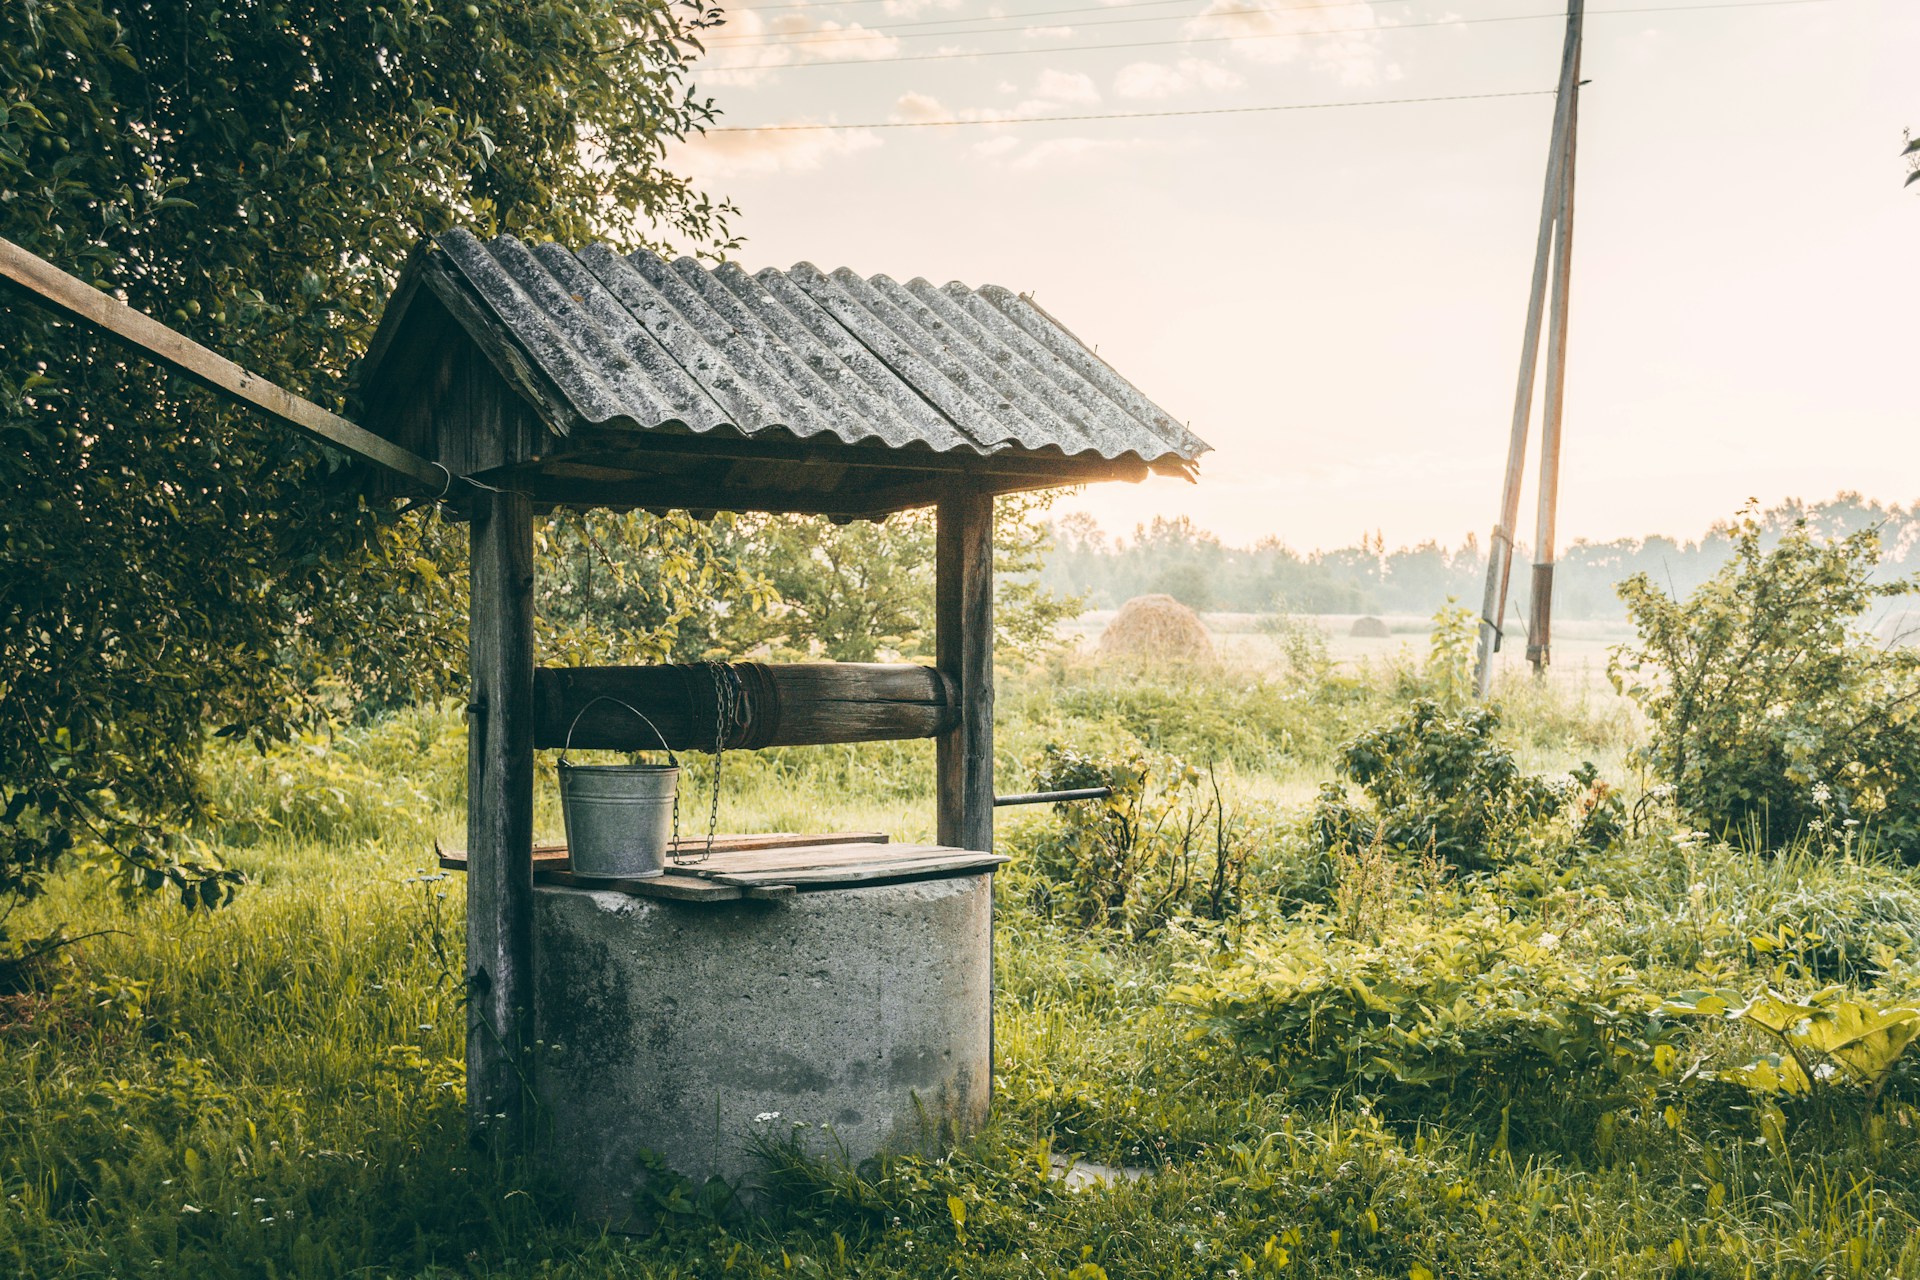
Self-Sufficiency: Dig Your Own Well Safely and Legally

Water is an indispensable resource, especially for those who embrace the homesteading lifestyle. It’s crucial for drinking, cooking, sanitation, and supporting livestock and gardens, all of which are integral to a self-sufficient home. While public water systems are available, they aren’t always reliable or accessible, particularly in rural areas.
For those looking to ensure a steady water supply, digging a well on your property is a vital step. Before embarking on this endeavor, it’s important to consider several key factors to ensure success and safety.
First, identify the purpose of your well. Are you seeking a primary water source for your household, or do you need water for agricultural purposes? Each scenario requires a different approach. A well for landscaping might be a DIY project, as the water won’t be used for human or animal consumption. However, if the well will supply your household or animals, it’s advisable to consult with licensed professionals to guarantee safe water quality.
Despite the long history of well-digging, it’s not as simple as grabbing a shovel and digging until you hit water. Most states and jurisdictions have specific regulations governing well construction due to safety concerns and existing utilities. For instance, some areas require permits for drilling beyond a certain depth, such as 200 feet, or mandate professional drilling services.
Before you begin, research local regulations thoroughly. Key considerations include:
– Local regulations about water wells
– Required well depth for healthy water
– Maximum allowable well width
– Distance requirements from structures, sewer pipes, or septic lines
– Structural components needed to meet safety codes
– Awareness of underground utility lines
– Necessary permits and permissions
Once you’ve navigated the regulatory landscape, the next step is selecting the optimal location for your well. This decision is crucial, as an improperly placed well may yield insufficient or contaminated water. Investigate whether other wells exist nearby, as they can impact water availability. Additionally, consider the property’s topography, including hidden aquifers or rock formations.
Avoid locations near septic tanks, sewers, muddy areas, or waste matter to prevent contamination. Many people underestimate the depth required to access safe water, often needing to dig 100 feet or more. This depth ensures the water is free from contaminants like fertilizers.
Given the complexities and potential hazards of deep well digging, it’s often best to hire professionals. However, if you’re determined to undertake the project yourself, you can purchase a DIY well kit or gather the necessary components. Essential items include:
– 1.5 times the depth of your well in air hose
– 1.5 times the well depth in 1″ PVC pipe for the permanent well tube
– 300 feet of rope or more, depending on well depth
– 5 feet of 8″ PVC and 10 feet of 2″ PVC
For a DIY approach, follow these basic steps from A&T Well and Pump:
Begin by digging down about 5 feet with an auger or post-hole digger, fitting an 8″ PVC pipe into the hole with 4 inches above ground. Drill a 2″ hole into the pipe’s side and insert the 2″ PVC. Create a settling pond 10 feet away, connect it to the well with an 8-inch ditch, and cover the 2″ PVC pipe with dirt to transfer clean water.
Place a drum at the pond’s edge, facing the well. As the drum collects water from the well, it will empty into the pond and flow back in. Secure the PVC pipe to the drill, ensuring no leaks, and run the other end into a 55-gallon drum to create a space for mud and water to empty.
Drilling the well can take hours or weeks, depending on soil type and the tools or assistance available. Fill the well hole with water, activate the drill, and move it to break up the soil. When adding more pipe, remove the running drill from the water, turn off the pressure, and continue drilling downward.
Once you reach the desired depth, case off the well with SDR 35 pipe, extending 3 feet above ground, and secure it with concrete and pea gravel to prevent contamination. Finally, install your well pump, run the water until clear, and test it for safety.
For visual learners, A&T Well and Pump offers a YouTube video demonstrating the well-digging process.
Let us know what you think, please share your thoughts in the comments below.

Preparedness
5 Things You Need to Travel Across America Safely and Legally

Traveling across the United States is one of the great freedoms Americans enjoy. Whether you’re driving state to state, flying cross-country, or taking a long road trip, staying safe and fully within the law doesn’t require anything complicated. It just takes preparation, awareness, and a few essentials that every traveler should have in place before they go.
Here are five things you need to travel across America confidently, safely, and legally.
1. Valid Government-Issued Identification
This is non-negotiable.
A valid ID proves who you are and allows you to travel without unnecessary delays or problems.
For most people, this means:
- A valid driver’s license or REAL ID
- A state-issued ID card if you don’t drive
- A valid U.S. passport (especially useful for air travel)
If you’re flying, your ID must meet TSA requirements. If you’re driving, your license must be current and not suspended. Keep your ID easily accessible, but secure.
2. Proof of Legal Residency or Citizenship (If Applicable)
If you are a U.S. citizen, carrying proof such as a passport or passport card adds an extra layer of security during long trips, especially near border states or when flying.
If you are a legal resident or visa holder, you should always carry:
- Your valid visa or green card
- Any required travel documents associated with your status
Having proper documentation protects you from misunderstandings and unnecessary stress.
3. Proper Vehicle Documents (If Driving)
If you’re traveling by car, make sure your paperwork is up to date.
This includes:
- Vehicle registration
- Proof of insurance
- A valid driver’s license
Law enforcement checks are routine and usually brief when paperwork is in order. Keeping documents organized shows responsibility and helps everything go smoothly.
4. A Safe and Legal Travel Plan
You don’t need a strict itinerary, but you should know where you’re going and how you’ll get there.
A smart travel plan includes:
- Knowing your route and major stops
- Booking legal accommodations (hotels, campgrounds, or rentals)
- Understanding basic state laws (speed limits, phone use, toll roads)
Each state has its own rules, and being aware of them helps you avoid fines or problems.
5. Emergency Contacts and Communication
Safety isn’t just about laws — it’s about preparedness.
Carry a charged phone, a car charger or power bank, and a written list of emergency contacts in case technology fails.
It’s also wise to:
- Share your travel plans with someone you trust
- Check weather conditions regularly
- Keep emergency numbers saved and written down
Prepared travelers are calm travelers.
Final Thought
Traveling across America legally and safely doesn’t require fear or special permissions. It requires valid identification, proper documents, respect for local laws, and basic preparedness.
When you travel with everything in order, you’re free to enjoy the journey — not worry about it.
Preparedness
5 Home Items You Can Use for Protection During Emergencies

Emergencies don’t always come with a warning. Power outages, break-ins, severe weather, or unexpected disturbances can leave you needing to protect yourself long enough to get to safety. While the goal is never to engage or escalate, having everyday household items you can rely on for protection can give you valuable time, confidence, and control.
The following items are commonly found in most homes and can be used responsibly to create distance, draw attention, or help you escape when needed.
- A Heavy-Duty Flashlight
A solid flashlight is one of the most useful protective tools in an emergency.
A bright beam can temporarily disorient someone in a dark room, allowing you to move away or secure a door. It also helps you navigate safely during power outages, avoid hazards, and signal for help.
Keep one near your bed and another in a main living area. Choose LED models with long battery life.
- A Fire Extinguisher
Most people think of fire extinguishers only for fires, but they also offer protection in other emergencies.
A quick spray creates a cloud that can block vision and breathing for a moment, giving you a chance to escape. The extinguisher itself is also sturdy enough to hold defensively while you move away from danger.
Every home should have at least one accessible extinguisher.
- A Sturdy Walking Cane or Umbrella
A cane or strong umbrella provides reach and distance without requiring physical strength.
These items can be used to keep space between you and a threat, block movement, or help you maneuver safely toward an exit. Many people already keep one near a door or bedroom, making it easy to grab quickly.
- A Loud Personal Alarm or Whistle
Sound is a powerful protective tool.
A personal alarm or whistle can startle an intruder, alert neighbors, and draw immediate attention to your situation. It’s especially helpful if shouting isn’t an option or if you live in close quarters like an apartment or townhome.
These devices are inexpensive, simple to use, and effective.
- A Doorstop or Heavy Furniture
Creating a barrier can be more effective than any object in your hands.
A basic rubber doorstop can slow or prevent a door from opening, buying you time to call for help or escape. Heavy furniture, when used carefully, can block entry points and turn a room into a temporary safe space.
Final Reminder
Protection during emergencies is about time and distance, not confrontation.
Use everyday items only as a last resort and only to help you reach safety or get help.
Preparation doesn’t mean fear — it means being ready to act calmly when it matters most.
Off The Grid
10 Emergency Medical Supplies to Carry for Survival During an Apocalypse

In any large-scale collapse scenario, medical help may be delayed or unavailable entirely. Hospitals may be overwhelmed, pharmacies closed, and emergency responders unable to reach you. In those moments, having the right medical supplies can mean the difference between a manageable injury and a life-threatening situation. A survival medical kit should focus on stopping bleeding, preventing infection, managing pain, and keeping you functional.
Here are ten critical medical supplies you should carry for survival during an apocalypse or any extreme emergency.
1. Tourniquet
Severe bleeding is one of the fastest ways people die from injuries. A proper tourniquet allows you to stop life-threatening blood loss from arms or legs within seconds. This is one of the most important items in any survival medical kit.
2. Compression Bandages
Compression bandages apply steady pressure to wounds and help control bleeding. They are especially useful for deep cuts, punctures, and traumatic injuries. They also help secure wound dressings in place when movement is unavoidable.
3. Sterile Gauze Pads
Gauze is essential for cleaning wounds, absorbing blood, and protecting injuries from dirt and bacteria. Carry multiple sizes so you can handle both small cuts and larger wounds. Clean wounds heal faster and are far less likely to become infected.
4. Antiseptic Wipes or Solution
Infections become deadly quickly when antibiotics are unavailable. Antiseptic wipes, iodine swabs, or antiseptic spray help kill bacteria before it enters the body. Cleaning a wound properly is just as important as stopping the bleeding.
5. Medical Tape
Medical tape secures bandages, gauze, and splints. It is lightweight, versatile, and far more reliable than improvised solutions. Tape can also be used to reinforce blisters and prevent minor injuries from getting worse during long travel.
6. Pain Relievers
Pain can limit movement, focus, and decision-making. Over-the-counter pain relievers help reduce inflammation, headaches, muscle pain, and fever. Staying mobile and alert during a survival situation is critical.
7. Antibiotic Ointment
Topical antibiotic ointment adds another layer of protection against infection. Even small cuts can turn serious when sanitation is poor. A small tube takes almost no space and can prevent days or weeks of complications.
8. Tweezers
Tweezers are vital for removing splinters, glass, thorns, ticks, and debris from wounds. Leaving foreign objects embedded in the skin increases infection risk and slows healing. Precision tools matter when conditions are rough.
9. Nitrile Gloves
Protecting yourself while treating injuries is essential. Gloves reduce the spread of bacteria and protect both the injured person and the caregiver. They are especially important when dealing with blood or open wounds.
10. Emergency Medical Guide
In a collapse scenario, you may need to treat injuries you have never dealt with before. A small first-aid or emergency medical guide gives step-by-step instructions when stress makes thinking difficult. Knowledge becomes as valuable as any tool you carry.
Final Thoughts
Medical preparedness is often overlooked in survival planning, yet injuries are more likely than dramatic threats. Cuts, falls, burns, and infections happen fast and worsen without care. Carrying these ten medical supplies gives you the ability to stabilize injuries, prevent infection, and stay functional when professional help is no longer available.
-

 Tactical2 years ago
70-Year-Old Fends Off Intruder with Lead-Powered Message
-

 Tactical2 years ago
Vape Shop Employee Confronts Armed Crooks, Sends Them Running
-

 Off The Grid3 months ago
10 Foods That Could Save Your Life When Grocery Shelves Are Empty
-

 Preparedness2 months ago
5 Things You Should Always Carry During a Winter Storm
-

 Preparedness1 year ago
Ex-Ballerina’s Guilty Verdict Sends Tremors Through Gun-Owner Community
-

 Nature and Wildlife3 months ago
10 Survival Skills You Should Learn Before You Need Them
-

 Preparedness1 year ago
Good Samaritan Saves Trooper in Harrowing Interstate Confrontation
-

 Preparedness7 months ago
How Much Gasoline Should You Store for Emergencies?
Dennis Arnold
April 19, 2025 at 10:09 am
Great story